From Code to Cloud: A Complete AKS and ACR Deployment Walkthrough
A practitioner's step-by-step guide to pushing container images, standing up a Kubernetes cluster, and routing real traffic — all the way from your local terminal to a live Azure endpoint.
By Janelle·July 29, 2026·☕ 18 min read
Table of Contents
There's a specific kind of satisfaction that comes from watching your containerized application — the one you've been running locally with a simple docker compose up — suddenly become accessible from a public IP in the cloud. It doesn't happen by magic, though. Between "it works on my machine" and "it runs in production" lies a surprisingly navigable path through Azure Container Registry, Azure Kubernetes Service, Helm charts, and a handful of YAML manifests. I know this path well now, because I've just finished walking every inch of it.
This walkthrough documents a real end-to-end deployment: pushing a containerized API service (and frontend) to Azure Container Registry, standing up an AKS cluster, wiring the two together with managed identities, writing Deployment and Service manifests, installing an NGINX Ingress Controller, and verifying that actual HTTP traffic reaches the correct pods. I'll share the exact commands I ran, the YAML I wrote, the portal views I checked — and the gotchas that burned me along the way.
The target reader is a developer who is comfortable with Docker and has played with Azure at least a little, but hasn't yet deployed a full Kubernetes workload to the cloud. By the end, you'll have a repeatable mental model — and a command cheat sheet — for doing this yourself.
1. The Big Picture: What We're Building
Before diving into commands and YAML, let's be clear about the architecture we're assembling. There are five moving parts:
Azure Container Registry (ACR) — A private Docker registry hosted in Azure. Your images live here, versioned and tagged, ready to be pulled by the cluster.
Azure Kubernetes Service (AKS) — A managed Kubernetes cluster. Azure handles the control plane; you manage your workloads via kubectl and YAML manifests.
Kubernetes Deployments — The manifests that tell AKS what container image to run, how many replicas to maintain, and what resources to allocate.
Kubernetes Services — The networking layer that exposes your Deployments — either internally (ClusterIP) or externally (LoadBalancer) — and handles pod discovery.
NGINX Ingress Controller — A single entry point that receives all inbound HTTP(S) traffic and routes it to the correct Service based on host and path rules you define.
The overall flow is clean: your CI pipeline (or your local terminal, for now) builds a Docker image and pushes it to ACR. AKS pulls that image from ACR — securely, via managed identity — and runs it as pods. The Ingress Controller receives traffic from the public internet and routes it to the right pod.
📌 Why AKS + ACR?
Private image storage: ACR keeps your images in your own Azure subscription — no Docker Hub rate limits, no public exposure.
Tight RBAC integration: Azure's managed identity system allows AKS nodes to pull from ACR without storing credentials anywhere.
Managed control plane: Azure runs Kubernetes masters for you. You never patch etcd or worry about API server uptime.
Horizontal scalability: Node pools can autoscale, and the Horizontal Pod Autoscaler can scale workloads independently.
2. Setting Up Azure Container Registry
ACR is where your Docker images live in the cloud. Think of it as Docker Hub, but private, fast from Azure's network, and wired directly into your AKS cluster. Setup is quick — the important thing is understanding the hierarchy: a Registry contains Repositories, each repository contains Tags, and each tag resolves to a Manifest.
Creating the Registry and Pushing Your First Image
bash
# Create a resource group if you don't have one
az group create --name myResourceGroup --location eastus

# Create the ACR (Basic SKU is fine for dev/staging)
az acr create --resource-group myResourceGroup \
  --name myAcrRegistry --sku Basic

# Login to ACR — this configures your local Docker daemon
az acr login --name myAcrRegistry

# Tag your local image for ACR
docker tag myapp:latest myAcrRegistry.azurecr.io/myapp/api:latest

# Push the image to ACR
docker push myAcrRegistry.azurecr.io/myapp/api:latest

# (Optional) Push a versioned tag alongside latest
docker tag myapp:latest myAcrRegistry.azurecr.io/myapp/api:v1.0
docker push myAcrRegistry.azurecr.io/myapp/api:v1.0
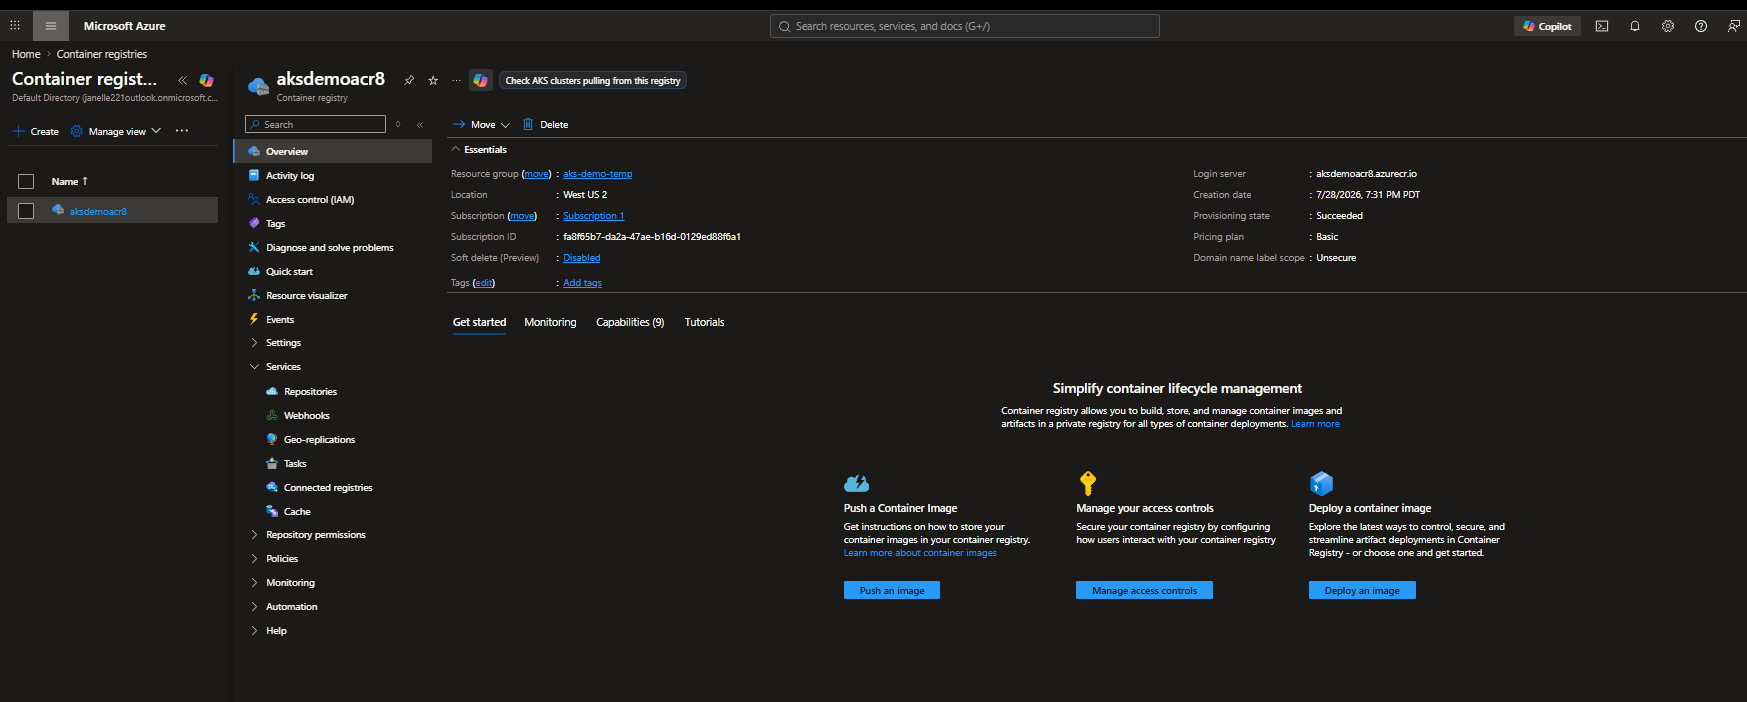
Once the push completes, head to the Azure Portal. Navigate to your ACR instance, then Repositories. You'll see your repo listed there, confirming the push succeeded.
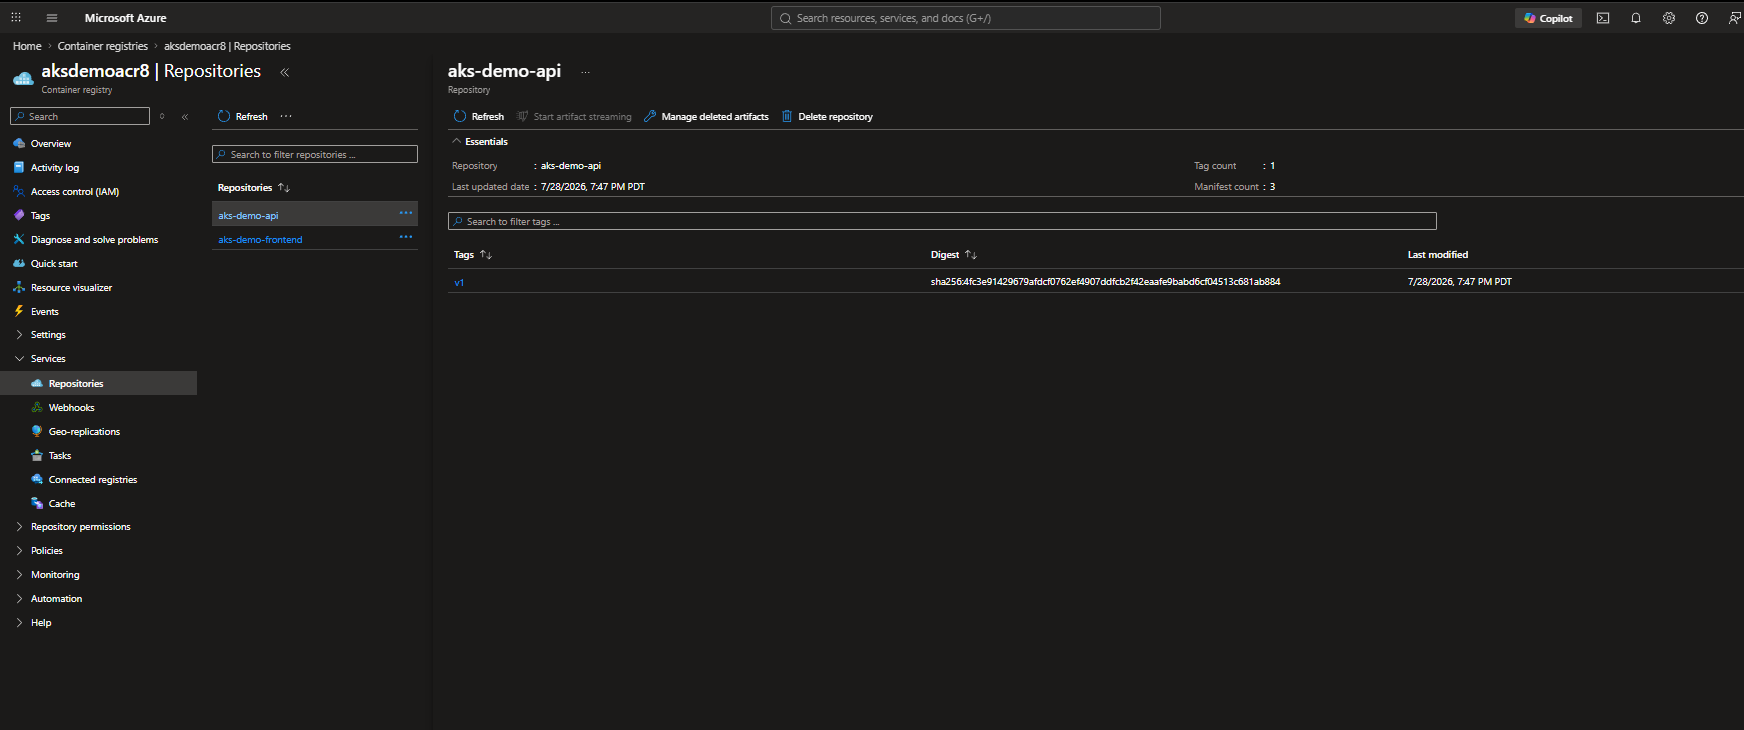
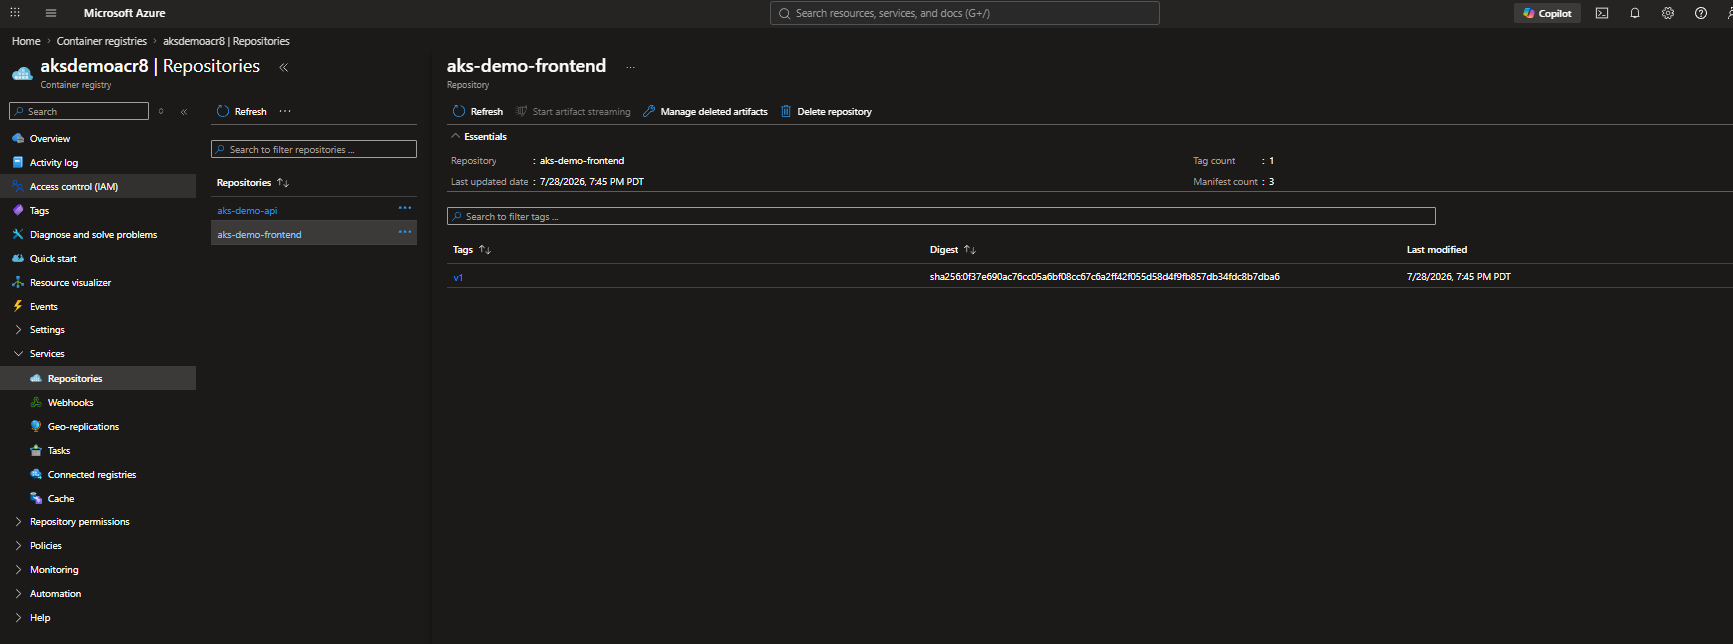
The Repositories blade in the Azure Portal lists all pushed repositories — e.g., myapp/api and myapp/frontend. Seeing your repo appear here is the first confirmation that your Docker push succeeded and ACR has received the image layers correctly.
The Tags view within a repository shows every tagged version available — for example, latest, v1.0, and v1.1. This view is where you confirm multi-version tagging is working.
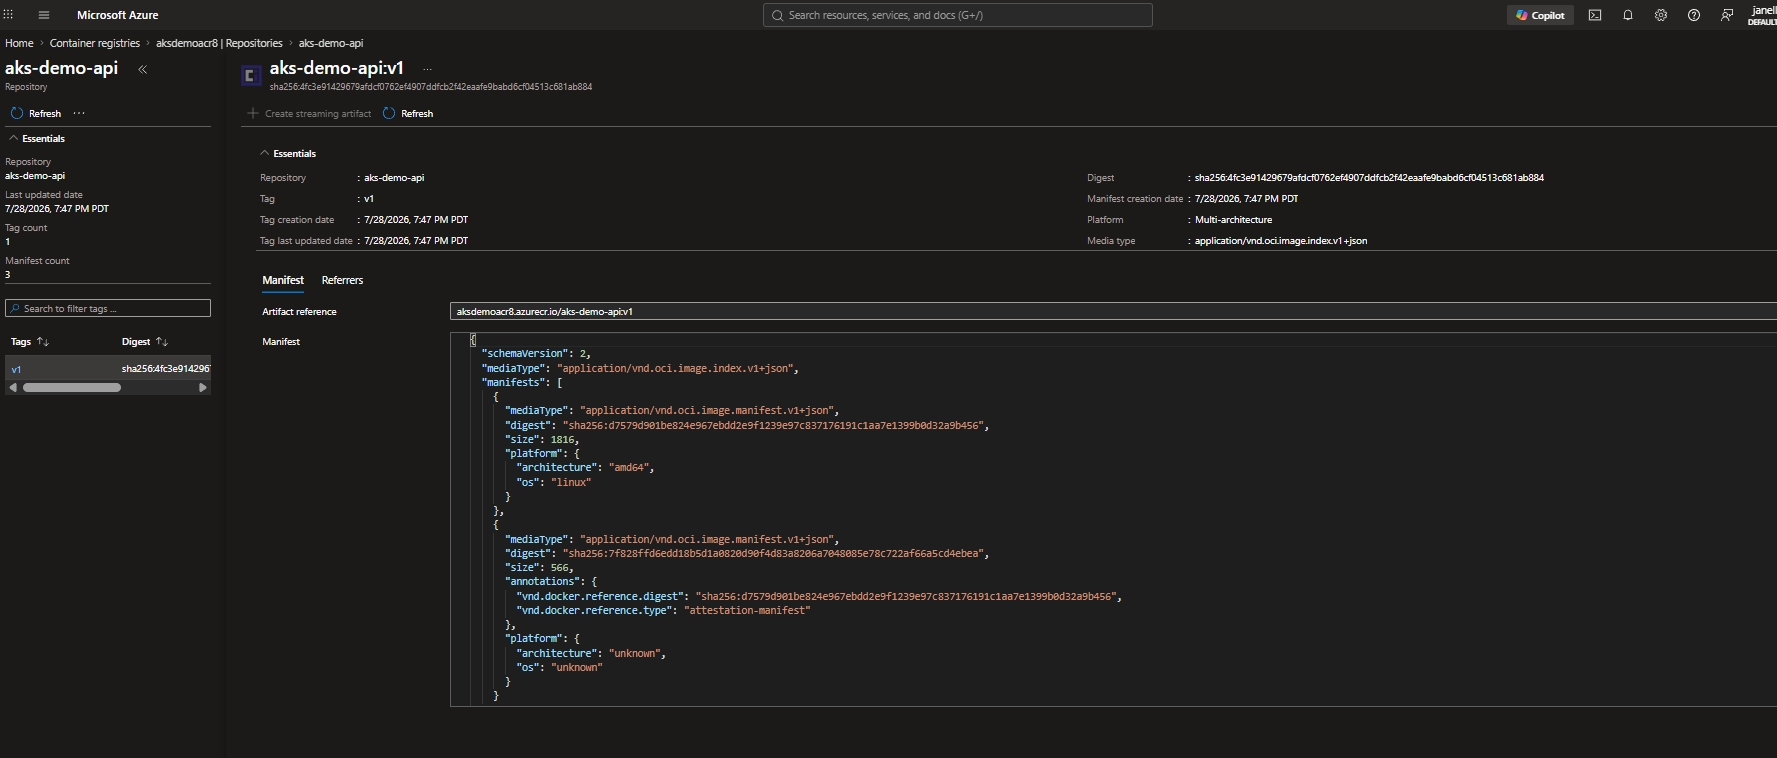
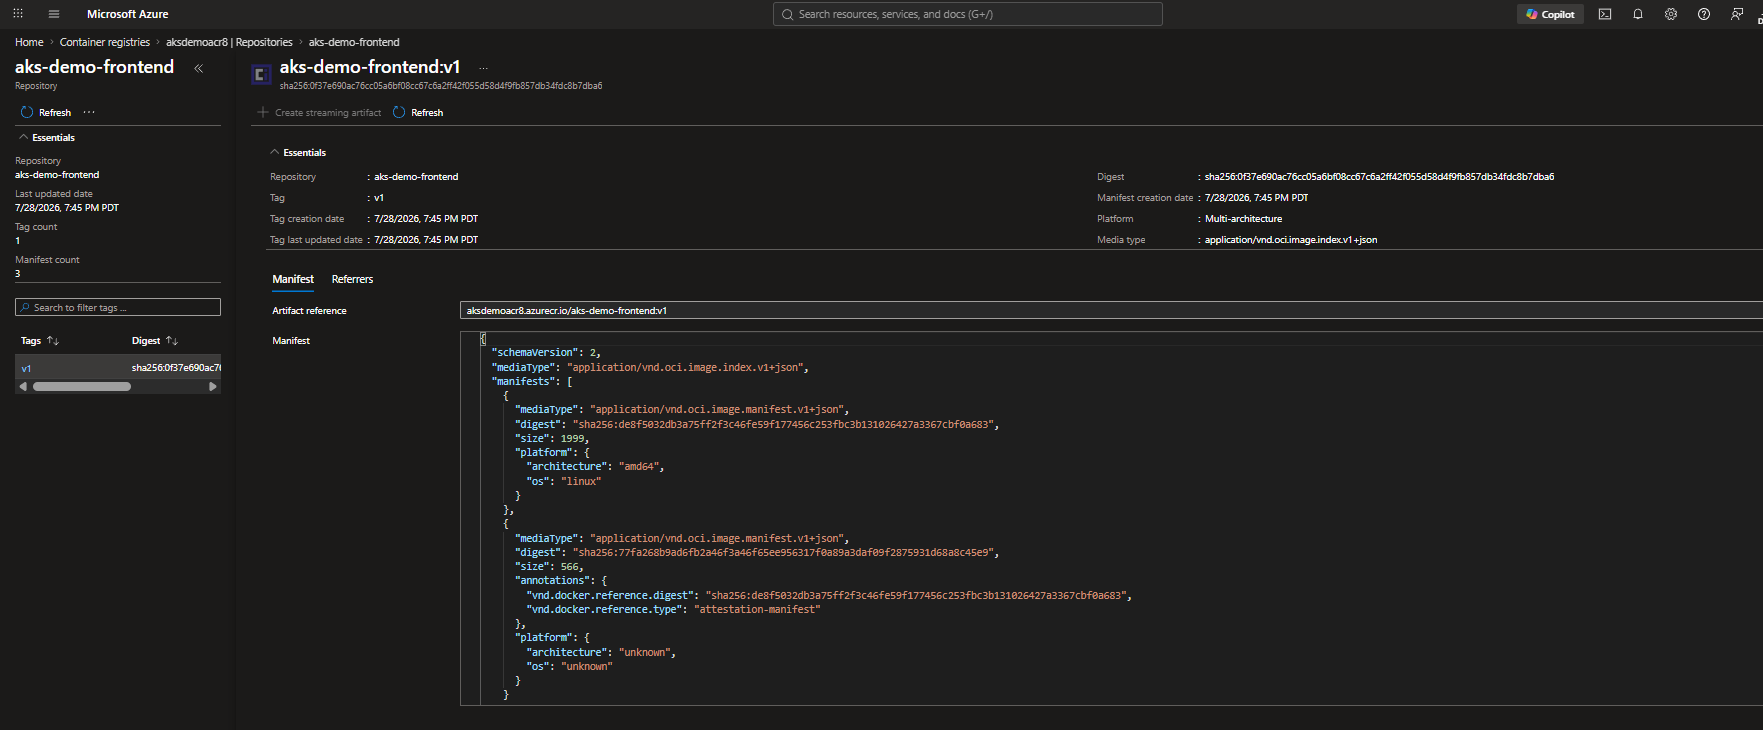
The Manifest view shows the image digest (SHA256), OS and architecture (e.g., linux/amd64), compressed image size, and the timestamp of the push. The digest is what Kubernetes ultimately uses to guarantee it pulls the exact image you pushed.
💡 Tip
In production, latest is a trap. It's mutable — any new push can overwrite it — which makes rollbacks unreliable. Instead, tag with the Git commit SHA (myapp/api:a3f9c1d) or a semantic version (myapp/api:v2.3.1). Pin your Kubernetes manifests to an explicit, immutable tag. Your future self, debugging a bad deploy at 2 AM, will thank you.
3. Standing Up the AKS Cluster
With images safely in ACR, it's time to create the Kubernetes cluster that will run them. AKS takes care of the control plane — the API server, scheduler, etcd, controller manager — so you're really just defining the node pool.
bash
# Create a 2-node AKS cluster, attaching ACR at creation time
az aks create \
  --resource-group myResourceGroup \
  --name myAKSCluster \
  --node-count 2 \
  --node-vm-size Standard_B2s \
  --generate-ssh-keys \
  --attach-acr myAcrRegistry

# Merge AKS credentials into your local kubeconfig
az aks get-credentials \
  --resource-group myResourceGroup \
  --name myAKSCluster

# Confirm your nodes are Ready
kubectl get nodes
The kubectl get nodes output should show both nodes in Ready status within a couple of minutes. If a node shows NotReady, give it another 60 seconds — bootstrapping takes a moment after the cluster reports as created.
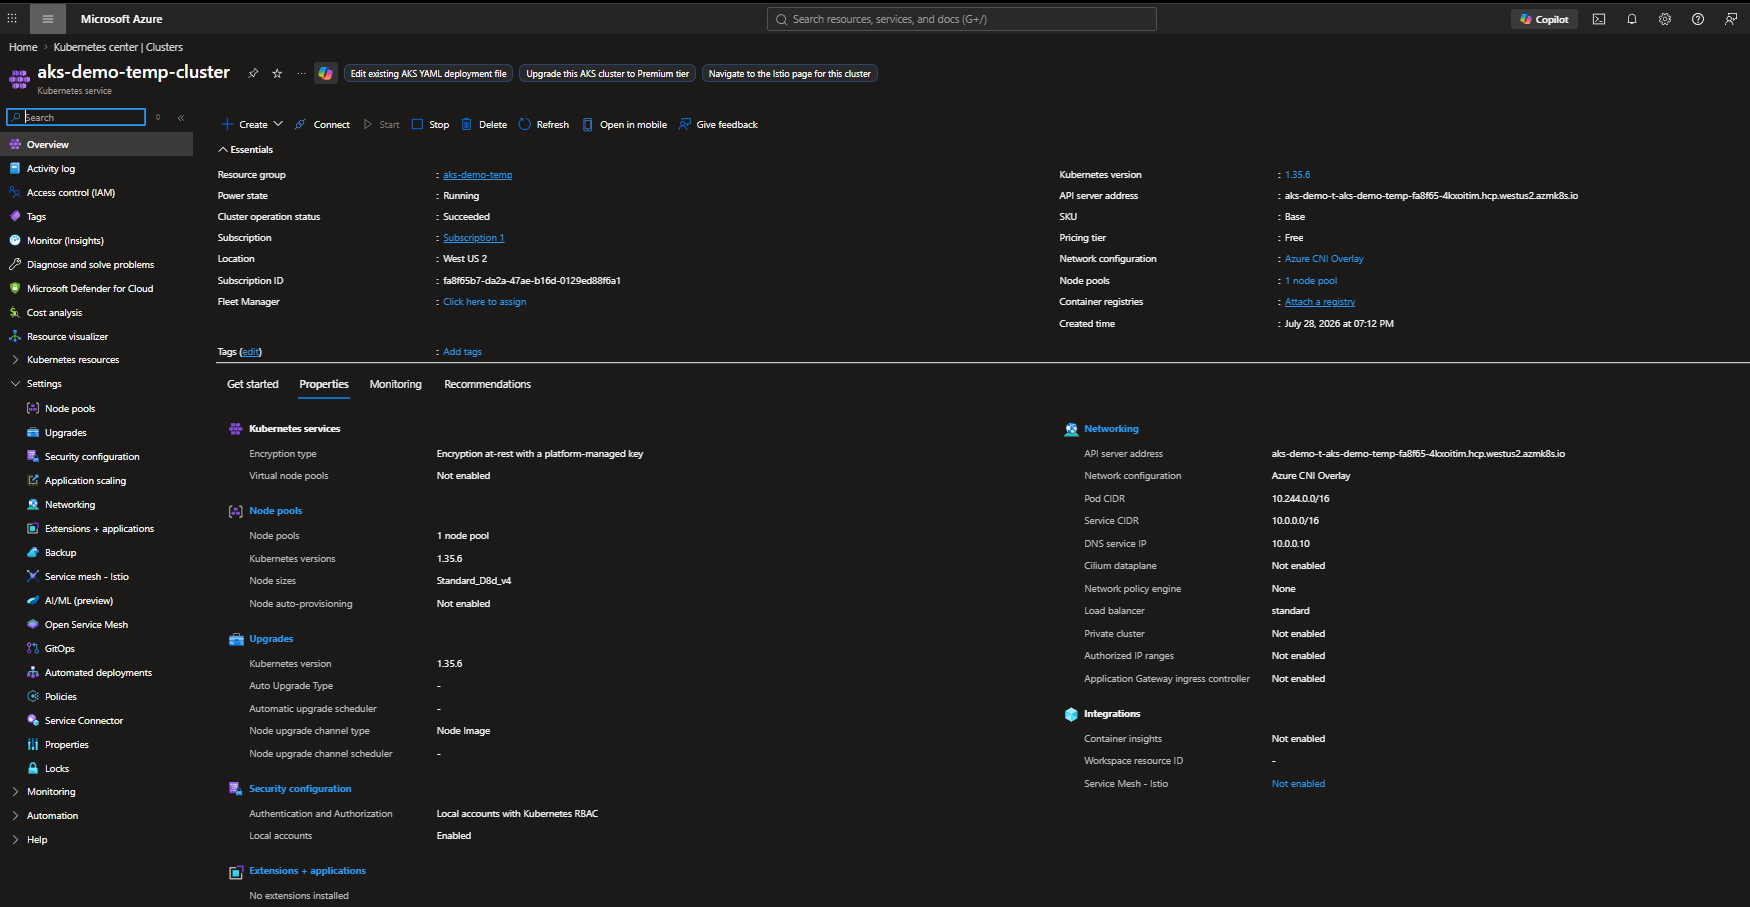
The AKS Overview blade surfaces the cluster name, resource group, Kubernetes version, node pool status (Running), and the API server endpoint. The health summary here is a fast sanity check before you start deploying workloads.
💡 Tip
Passing --attach-acr at cluster creation time (or running az aks update --attach-acr <acr-name> on an existing cluster) grants the AKS-managed identity the AcrPull role on the registry. This means every node in the cluster can pull images from your ACR without image pull secrets — fewer secrets to rotate, fewer ImagePullBackOff surprises.
4. Writing and Applying Kubernetes Manifests
This is where the real work happens. Kubernetes manifests are declarative YAML files that describe your desired state. There are two fundamental manifest types for every workload: a Deployment and a Service.
apiVersion: v1
kind: Service
metadata:
name: api-service
spec:
type: ClusterIP
selector:
app: myapp-api # Must match the Deployment's pod labels exactlyports:
- protocol: TCP
port: 80# Port the Service exposes internallytargetPort: 3000# Port your container actually listens on
Applying the Manifests
bash
# Apply a single file
kubectl apply -f api-deployment.yaml
kubectl apply -f api-service.yaml

# Or apply an entire directory at once
kubectl apply -f ./manifests/

# Watch the rollout progress
kubectl rollout status deployment/api-deployment

# Check running pods
kubectl get pods -l app=myapp-api
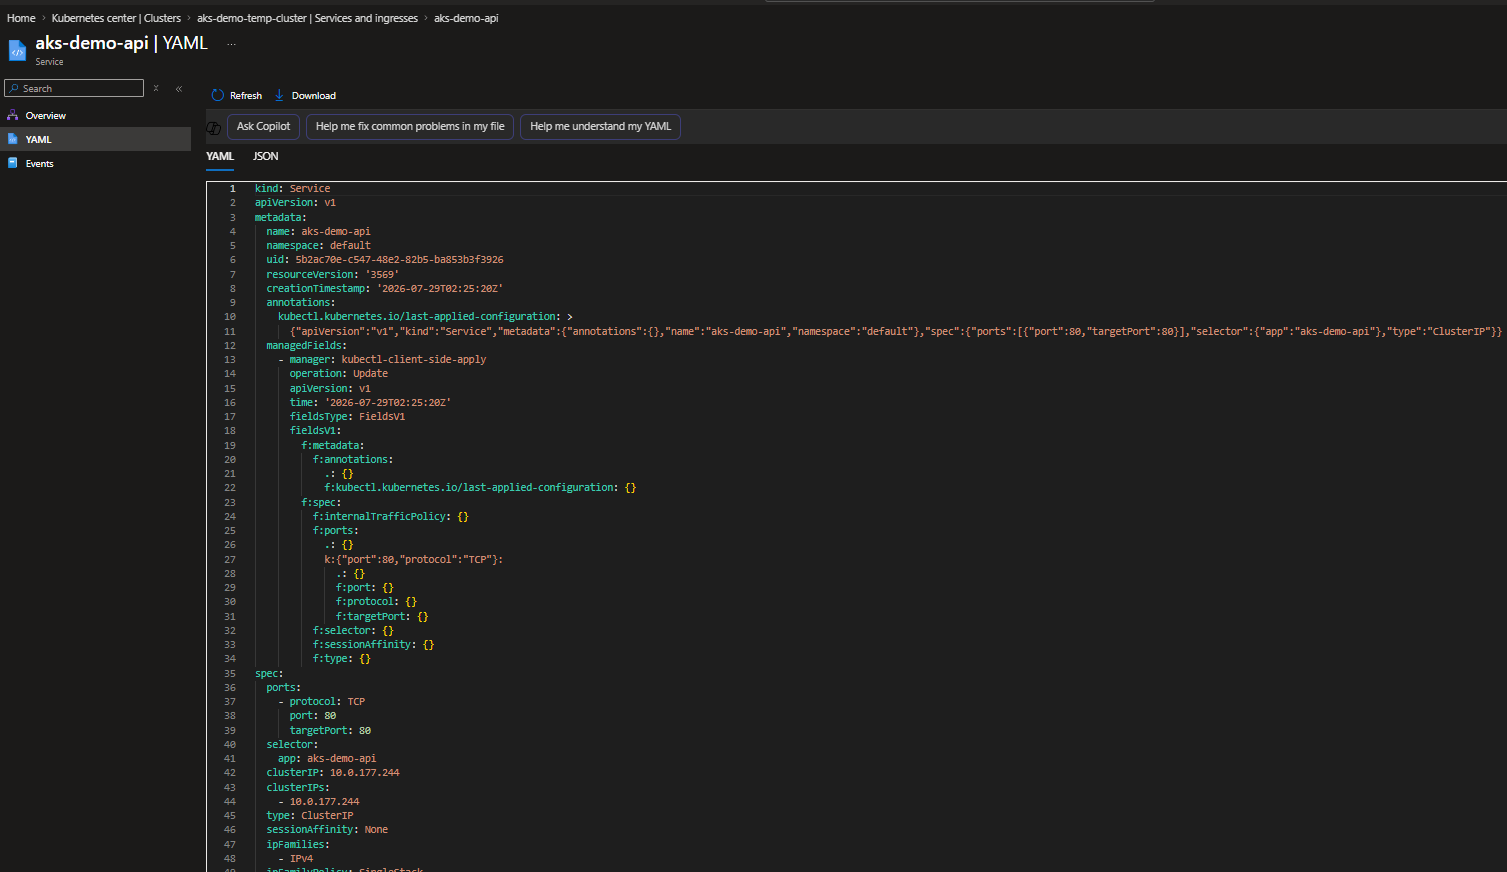
The YAML view of the deployed API Service shows the full spec: kind: Service, type: ClusterIP, port mappings (port: 80 → targetPort: 3000), and the selector labels. Cross-referencing this with your Deployment's pod labels is the fastest way to catch selector mismatches before they cause 503 errors.
⚠️ ImagePullBackOff Checklist
If your pods get stuck, the cause is almost always one of exactly three things:
Wrong image path or tag — The fully-qualified image name must match what's in ACR exactly, including capitalization.
ACR not attached to AKS — Run az aks update --attach-acr <acr-name> and wait for the role assignment to propagate.
Typo in the tag — Run az acr repository show-tags --name <acr> --repository myapp/api to verify the exact tag string.
Run kubectl describe pod <pod-name> and read the Events section — it will tell you exactly which is the culprit.
5. Installing the NGINX Ingress Controller
If you have multiple services, do you really want a separate Azure Load Balancer — and a separate public IP — for each one? The answer is the Ingress Controller: a single pod that owns one external IP, receives all inbound HTTP(S) traffic, and routes it to the correct internal Service.
bash
# Add the ingress-nginx Helm repository
helm repo add ingress-nginx https://kubernetes.github.io/ingress-nginx
helm repo update
# Install the ingress controller into its own namespace
helm install ingress-nginx ingress-nginx/ingress-nginx \
--namespace ingress-nginx \
--create-namespace \
--set controller.replicaCount=2# Verify the controller pod is running
kubectl get pods -n ingress-nginx
# Get the external IP Azure assigned to the controller's LoadBalancer
kubectl get svc -n ingress-nginx
Wait a minute or two after installation for Azure to provision the public IP. The EXTERNAL-IP column will initially show <pending> — once it shows a real IP, you're ready to define routing rules.
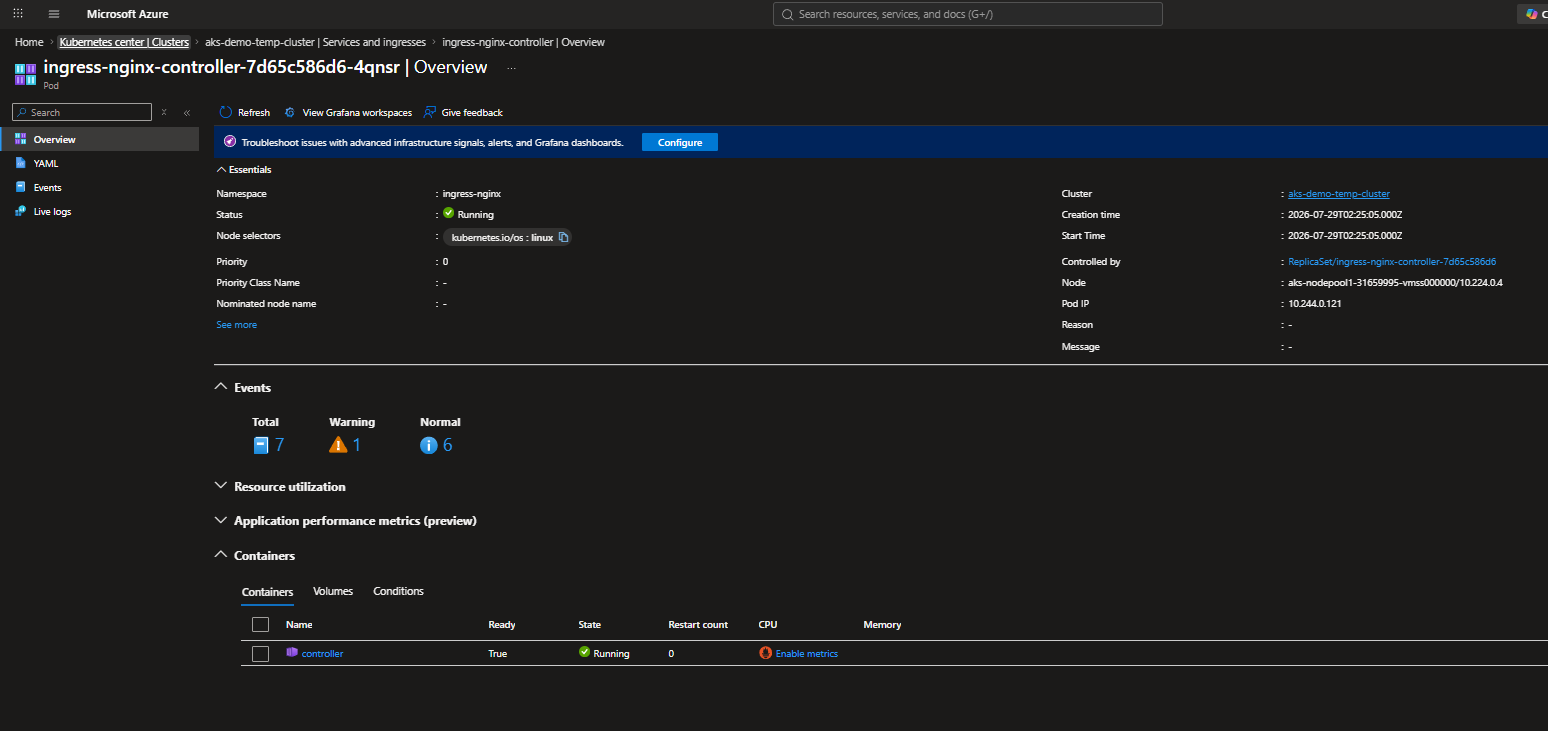
The output of kubectl get pods -n ingress-nginx showing the ingress controller pod in Running state. This pod is the traffic gateway for every inbound HTTP request — if it's not running, nothing reaches your services regardless of how correct your Ingress rules are.
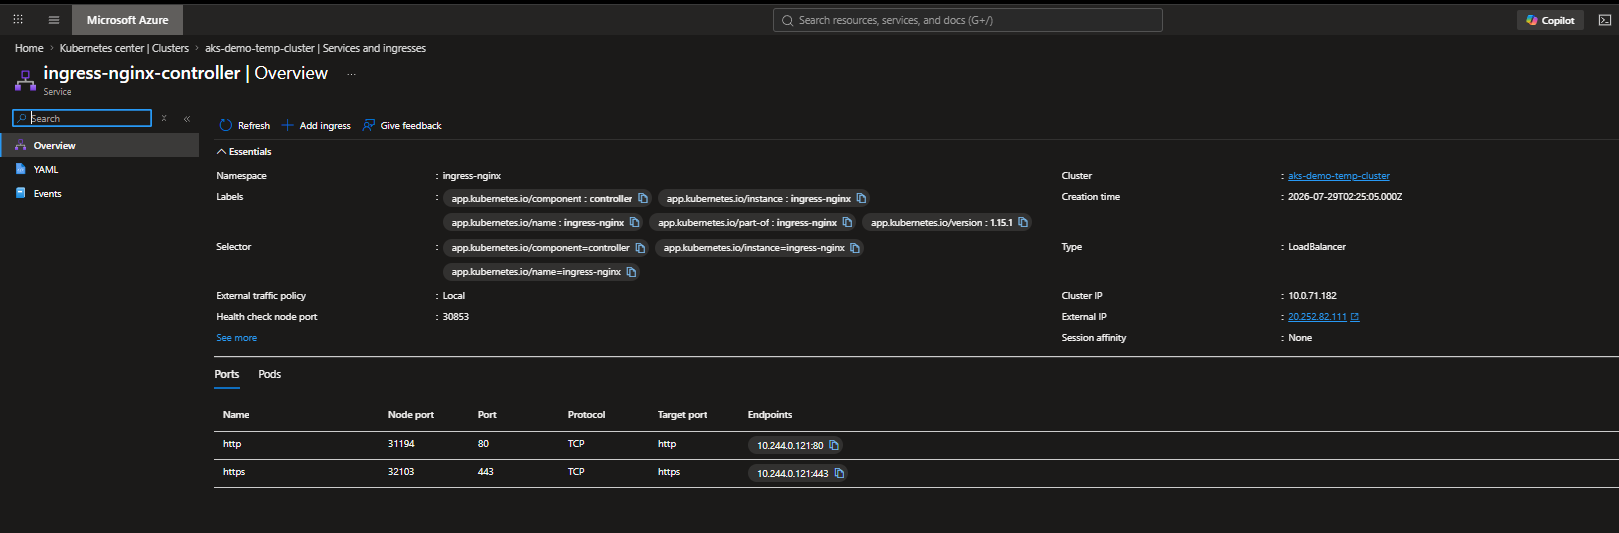
The output of kubectl get svc,ingress -A showing all services across namespaces with their cluster IPs and external IPs, alongside all Ingress resources with their hostnames. This is your bird's-eye view of the entire networking topology.
6. Defining Ingress Rules
An Ingress manifest is the routing table for the NGINX controller. It maps incoming request paths (or hostnames) to the Kubernetes Services that should handle them.
The rewrite-target: /$2 annotation tells NGINX to strip the path prefix before forwarding the request to the backend. Without it, a request to /api/users would be forwarded as /api/users to your API — which will return 404s if your API is mounted at /users. Always test this behavior with curl -v before assuming it's working correctly.
Everything is deployed. Now let's prove it works. Follow a methodical verification sequence — bottom-up, from infrastructure to traffic.
bash
# 1. Confirm all Deployments have desired replicas running
kubectl get deployments

# 2. Confirm all pods are in Running state
kubectl get pods

# 3. Confirm services exist with correct port mappings
kubectl get svc

# 4. Confirm ingress shows a bound address and correct rules
kubectl get ingress

# 5. Hit the endpoint — replace with your actual external IP
curl -v http://<EXTERNAL-IP>/api/health

# Get detailed info on any resource
kubectl describe ingress myapp-ingress
kubectl describe pod <pod-name>
When that curl returns a 200 OK from your API's health endpoint, you've completed the full deployment circuit. Code → Docker image → ACR → AKS → Pod → Service → Ingress → Public IP → HTTP response.
🔧 Troubleshooting Quick Reference
Symptom
Most Likely Cause
First Command to Run
ImagePullBackOff
Wrong image path/tag, or ACR not attached to AKS
kubectl describe pod <name> — read Events
CrashLoopBackOff
App is crashing at startup (bad env var, missing config)
kubectl logs <pod-name> --previous
503 from Ingress
Service selector doesn't match pod labels, or wrong targetPort
kubectl describe svc <service-name>
Ingress IP shows <pending>
Ingress controller not installed, or deployed to wrong namespace
kubectl get pods -n ingress-nginx
404 from correct IP
Path rewrite misconfigured, or ingressClassName missing
kubectl describe ingress <name>
8. Lessons Learned and Next Steps
Key Takeaways
The ACR ↔ AKS managed identity integration is a genuine DX win. Eliminating image pull secrets removes an entire class of credential-management headaches.
Label selectors are where almost every bug hides. If a Service can't find its pods, check whether the selector labels match the pod labels — exactly, including capitalization.
The Azure Portal's YAML view is a legitimately useful debugging tool. Fast, readable sanity check — especially useful for confirming kubectl apply produced the spec you intended.
Ingress controllers unlock mature HTTP routing with minimal complexity. One public IP, one controller, unlimited routing flexibility.
YAML indentation matters more than it should. Lint your YAML with kubectl apply --dry-run=client -f manifest.yaml before applying for real.
What to Build Next
Topic
Description
Complexity
Helm Charts
Package all manifests into a versioned, parameterized chart
Medium
GitHub Actions CI/CD
Auto-build and push to ACR on every commit; trigger rollout automatically
Medium
Horizontal Pod Autoscaler
Scale pod replicas automatically based on CPU/memory metrics
Low–Medium
cert-manager + Let's Encrypt
Automatic TLS certificate provisioning for your Ingress
Manage environment-specific config without duplicating manifests
Medium
The gap between "containerized locally" and "running in the cloud" feels wide when you're standing at the edge of it. But it's actually a very walkable bridge — ACR for image storage, AKS for orchestration, a handful of YAML manifests, and NGINX Ingress for routing. Once you've made the crossing once, the mental model clicks into place and subsequent deployments feel much more fluent.
If you're working through your own AKS deployment right now: go section by section. Don't skip the verification steps in between. Check your label selectors twice. And when something goes sideways — and something will — kubectl describe and kubectl logs are almost always sufficient to identify the root cause within a few minutes. The cluster is more transparent than it seems; it just speaks YAML.
This is the first post in what will become a series. Next up: building a GitHub Actions pipeline that automatically builds, tags with the commit SHA, pushes to ACR, and rolls out to AKS — the full CI/CD loop with no manual steps.
✅ Quick Reference: The Full Command Sequence
az acr create → Create the registry
az acr login → Authenticate Docker to ACR
docker tag + docker push → Push your image
az aks create --attach-acr → Create the cluster, wired to ACR
az aks get-credentials → Connect kubectl
kubectl apply -f ./manifests/ → Deploy workloads
helm install ingress-nginx → Install the Ingress Controller